Many of the nebulas that we image have a starfield that sometimes affects the ability to see the structures of the nebula. Sometimes it is preferable to reduce the stars in order to bring out the nebula and its structures behind it.
Note: once you decide to reduce the stars many times it will require to manipulate the image in order to bring about the nebula.
This star reduction method utilizes star removal algorithims which utilize machine learning to determine what the underlying Nebula likely looks like. The technique can be done with both Starnet++ which is a free application and plugin to Pixinsight. Or you can utilize StarXTerminator which is a paid photoshop plugin by Russel Croman.
For the purposes of this demonstration we will focus on Adobe Photoshop utilizing the STarXTerminator plugin for star removal.
Prerequisites:
You will need to make sure you install the StarXTerminator plugin. There is a free trial if you would like to just try it out.
The Process
We will begin the process with an image which has an overpowering starfield. Note that this method works best with images which have a large starfield but also a lot of nebulosity. Images which have little Nebulosity will have a lot of artifacts after the star removal step and will be difficult to repair. I’ve chosen an image of the lion nebula SH2-132.
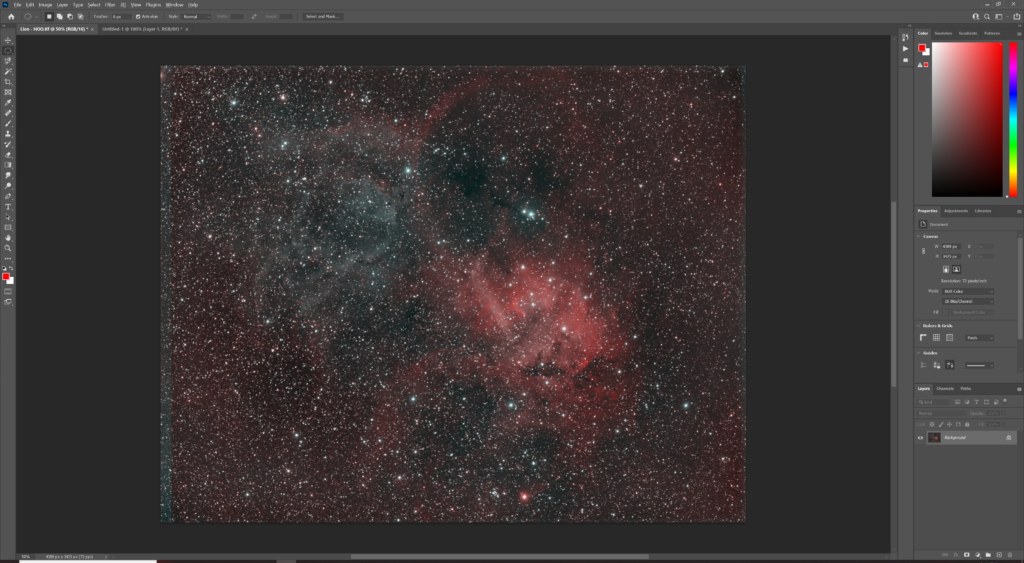
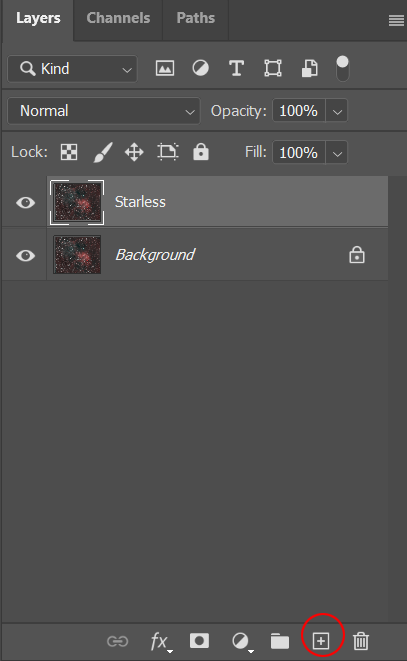
Step 1: Duplicate your background layer and rename it to “starless” You can do that by dragging the background layer or whatever layer you’re working with to the plus sign (see below)
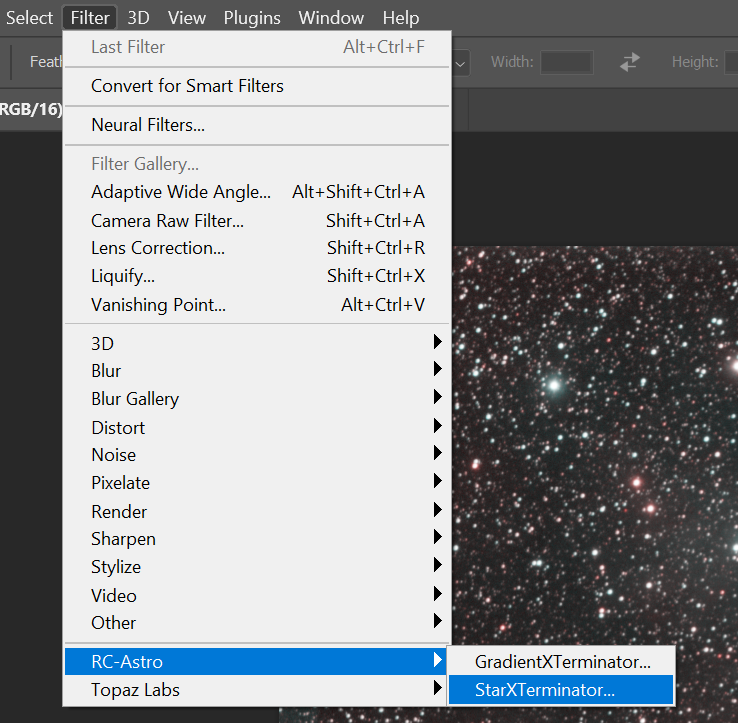
Step 2: From the filter menu go to RC-Astro then click on the StarXTerminator plugin. Once the filter launches just click ok to begin the star removal process.
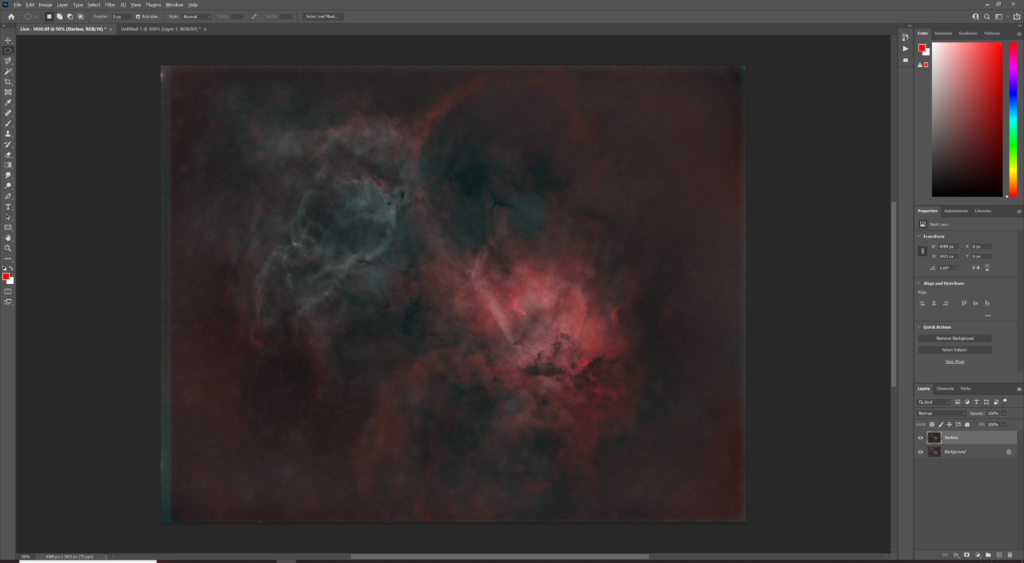
Once StarXterminator has run you will have an image similar to the one below. Note that there can tend to be many artifacts left over, especially when there are large stars. It’s advisable to repair the image at this point prior to any additional steps, however repair of star artifacts is beyond the scope of this tutorial and will be covered in a later tutorial.
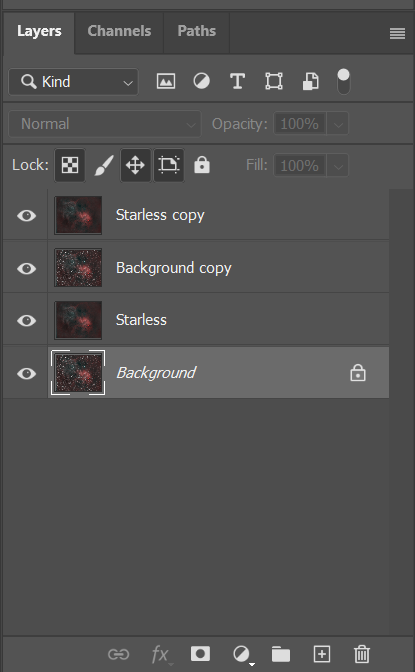
Step 3: Duplicate the starless layer, and the background layer and move them above the starless layer.
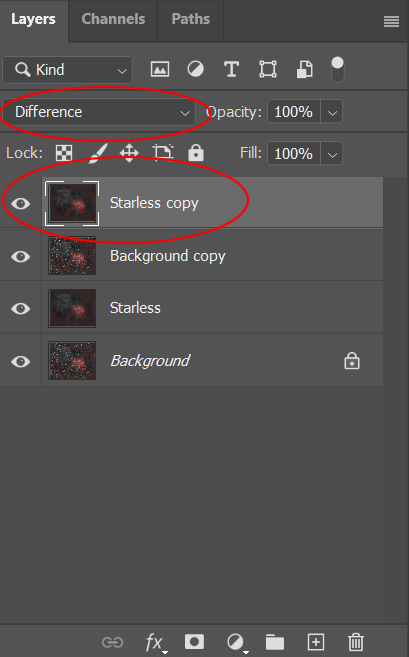
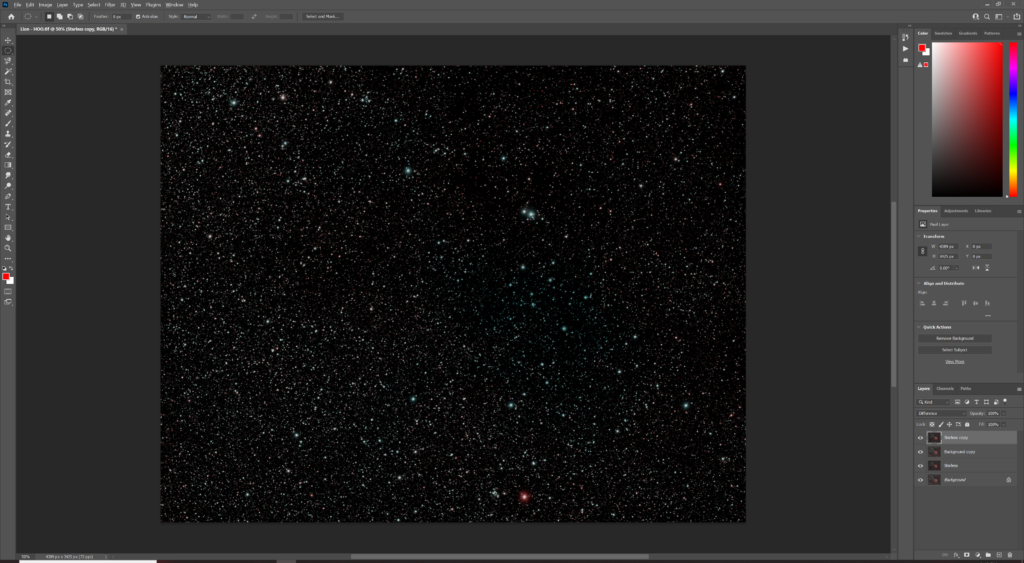
Step 4: Change the blending mode on the starless copy layer to “difference”
You should now have a layer which looks just like the stars only
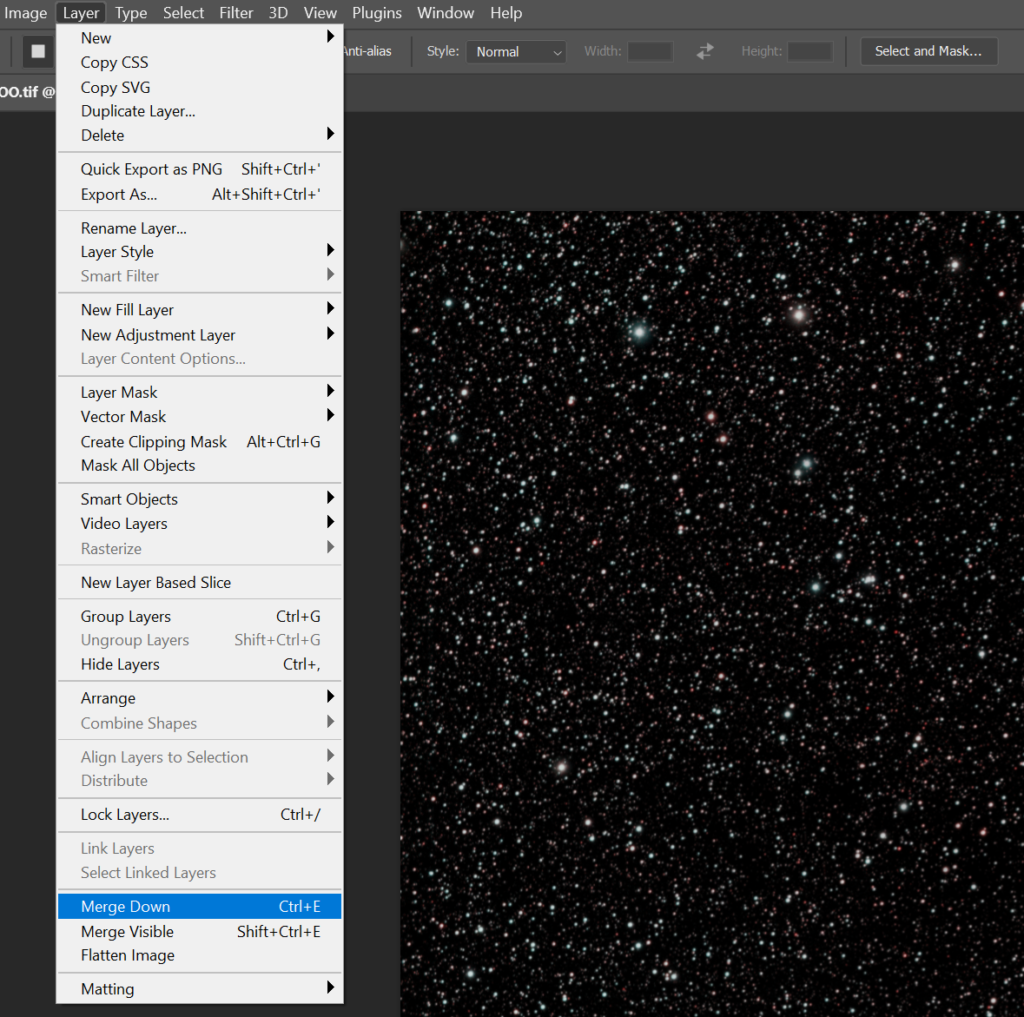
Step 5: Select the Starless Copy layer and go to Layer -> Merge Down. Rename the layer “stars”
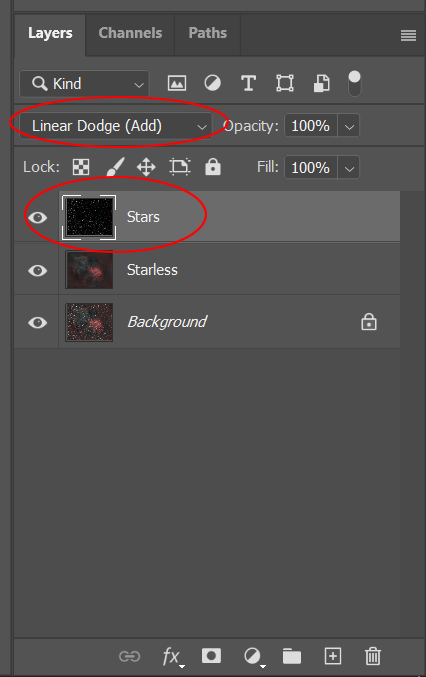
Step 6: Change the blending mode on the stars layer to “Linear Dodge”
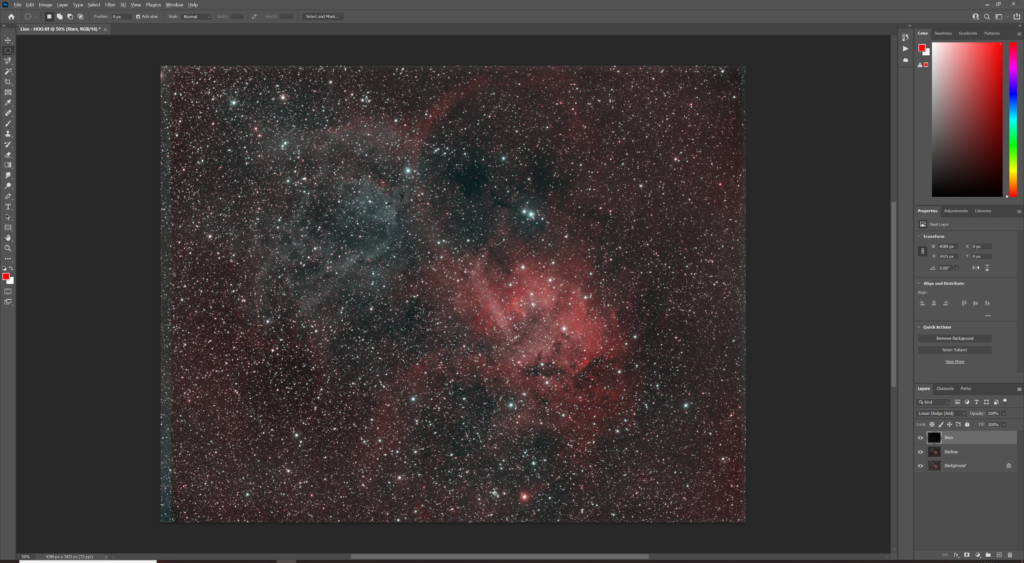
Star Reduction Step
At this point you should have an image that looks like your original image, but with the stars separated into their own layer which means you can now independently apply post processing techniques to the nebula and the stars.
To reduce the stars you will add an adjustment layer above the stars layer. For example here I am going to add a Levels layer.
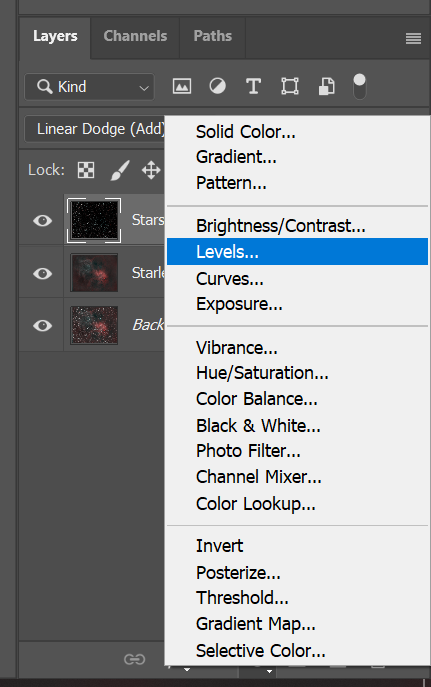
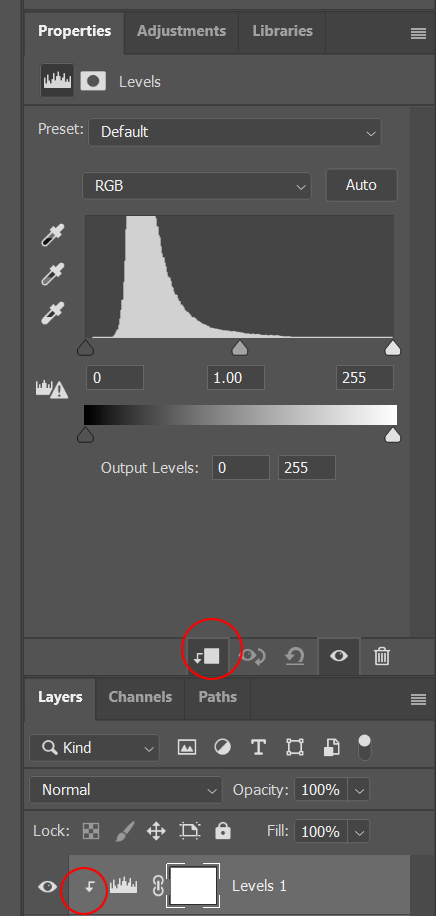
Important: By default the adjustment layer will apply to all layers below it, we want to apply the adjustment only to the stars layer. To do that click the adjustment click button. Once you do that you should see a little arrow next to your adjustment layer
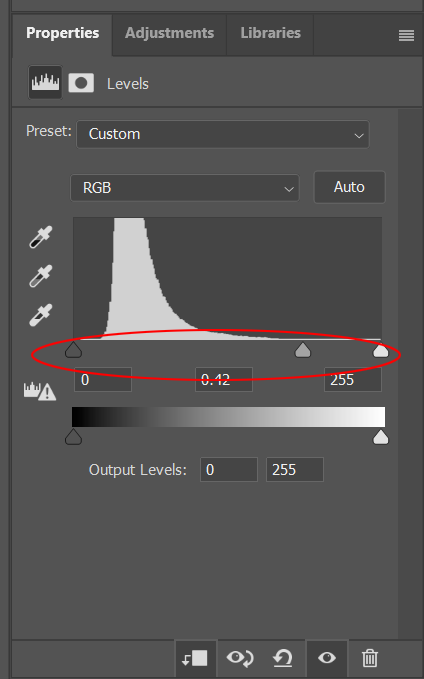
Now you should be able to change the midtones in the levels layer by adjusting the arrows which will reduce your stars.
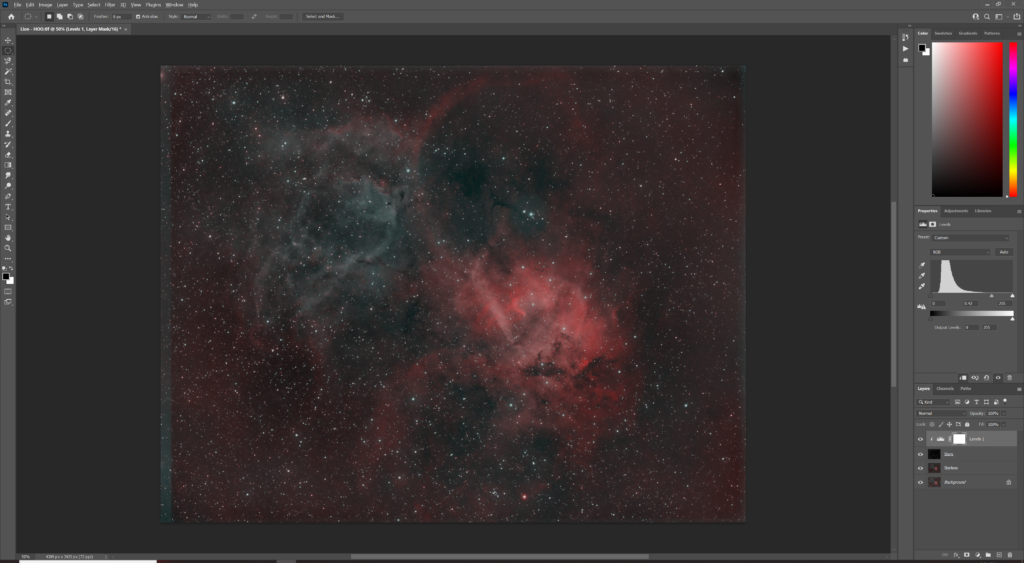
Before
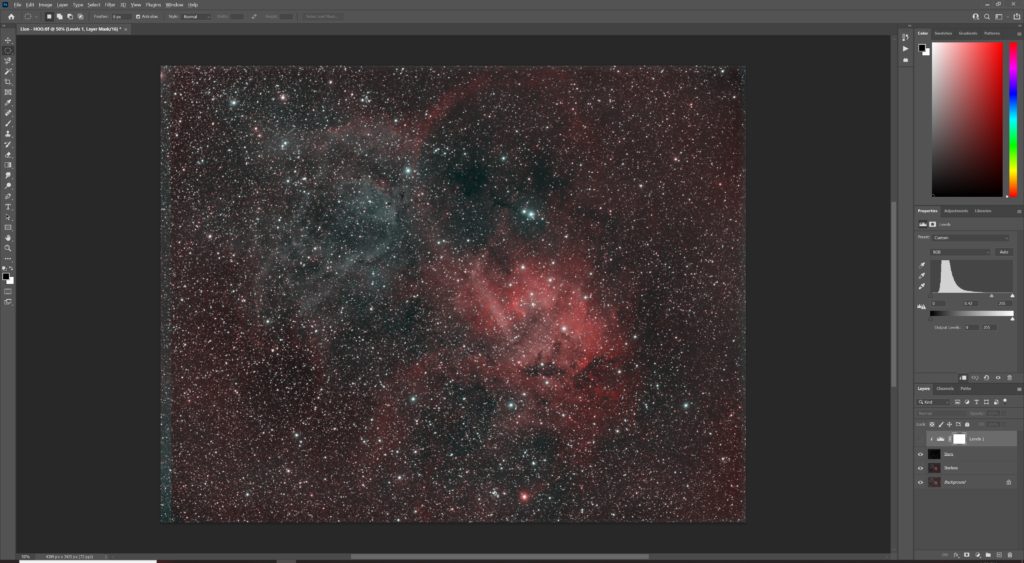
Note: You can add any sort of adjustment layer this way to the stars and make modifications as necessary. For example you may employ techniques to reduce star halo’s, or use curves.
Conclusion
This is not only a great way to reduce stars but it allows you to easily and independently work on a nebula away from the stars. But be careful, as stated this does not work well on all images, but it works especially well where there is a lot of nebula in your image.
Below is also a link to a photoshop action which will run through the above steps for you.
Download Nerdy Beardo Astronomy Tools
